本文共 4767 字,大约阅读时间需要 15 分钟。
TeamViewer is a cross-platform, proprietary application that allows a user to remotely connect to a workstation, transfer files, and have online meetings from any part of the globe over an internet connection. It works across multiple devices such as PC, smartphones, and tablets.
TeamViewer comes in handy, especially when troubleshooting PC issues in inaccessible or far-flung areas.
In this tutorial, we will walk you through how to install TeamViewer on Ubuntu 20.04 Desktop. There are 2 ways you can install TeamViewer, through the command line or using the graphical installer.
Install Teamviewer on Ubuntu (command line)
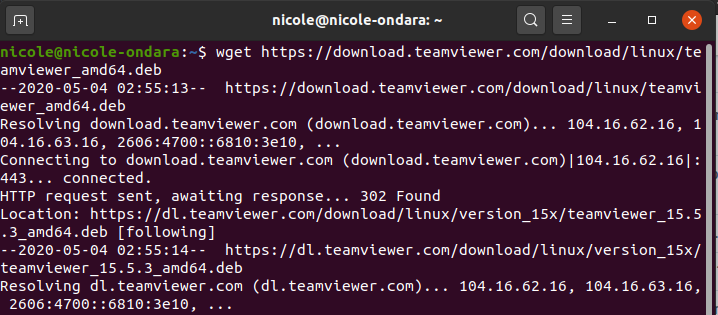
To install TeamViewer, first, . To accomplish this, open the Terminal and run the following .
$ wget https://download.teamviewer.com/download/linux/teamviewer_amd64.deb
Once you have downloaded the TeamViewer's Debian package, execute the following command to install teamviewer.
$ sudo apt install ./teamviewer_amd64.deb
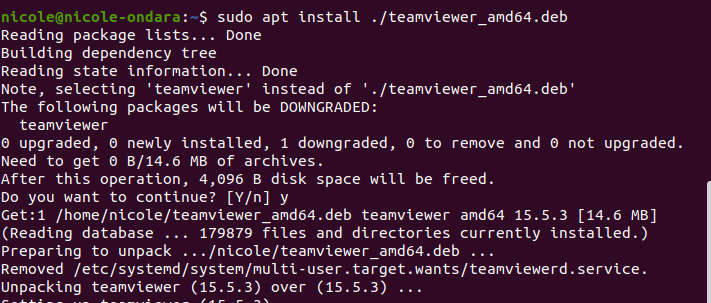
The system will prompt you with a [Y/n] option. Type 'Y' and hit the enter key in order for the installation to continue.

Launch TeamViewer
Once the installation is done, you can now launch Teamviewer. If you choose to launch TeamViewer via the command line, you can run this command to achieve that.
$ teamviewer
Additionally, you can launch the TeamViewer Application menu as shown.

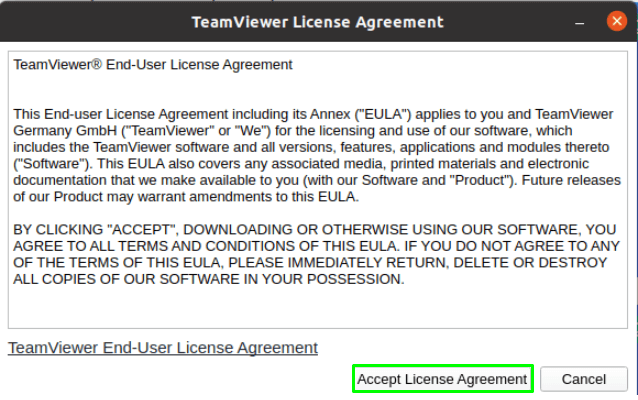
Upon clicking the TeamViewer icon, the pop-up License Agreement will be displayed. To proceed, click on the Accept License Agreement button.
Once you have accepted the License Agreement, TeamViewer will be launched as follows.
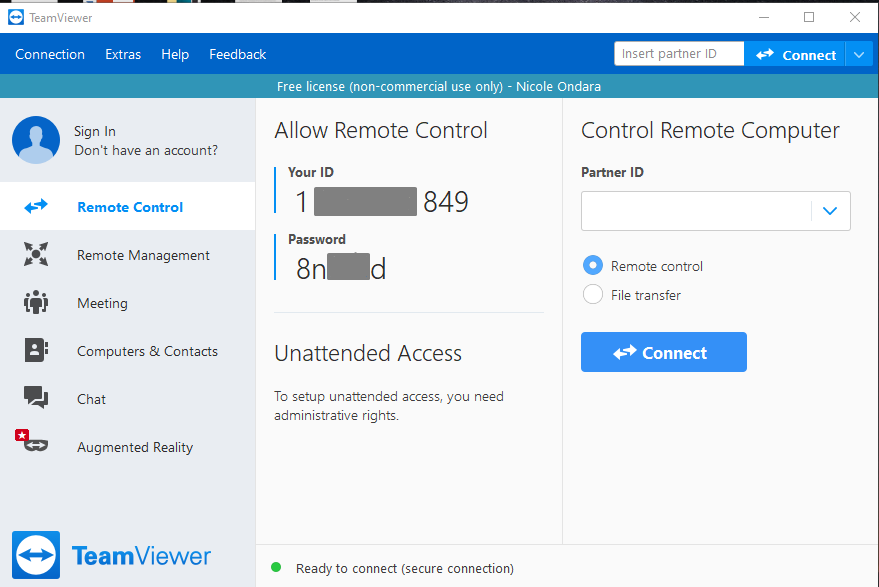
As you can see, it has an appealing and intuitive display with features such as an ID and a password that you use to connect with a remote system on the other end.
Install TeamViewer using Graphical Installer
Installing software through the User interface is quite easy. First, we have to download the Teamviewer .deb package then install it using the software Install.
Download the .deb installation package from . On the page, select the Ubuntu, Debian version, and click the 64-bit package. A window will pop up as shown below.
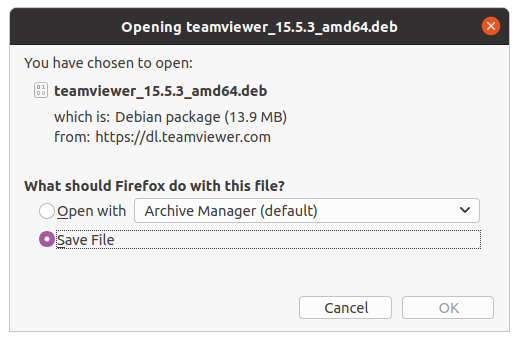
Select Save File, then click okay for the file to be saved on the downloads folder.
On the download folder, you will see the Teamviewer .deb package. Right-click on the package, then on the drop-down menu, select open with other applications. On the resulting window select on, open with the software install then click the select button.
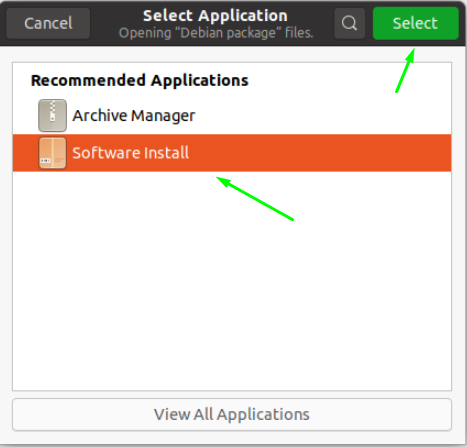
When you click select, it will take you to a new window for installing software. You'll see something like this.
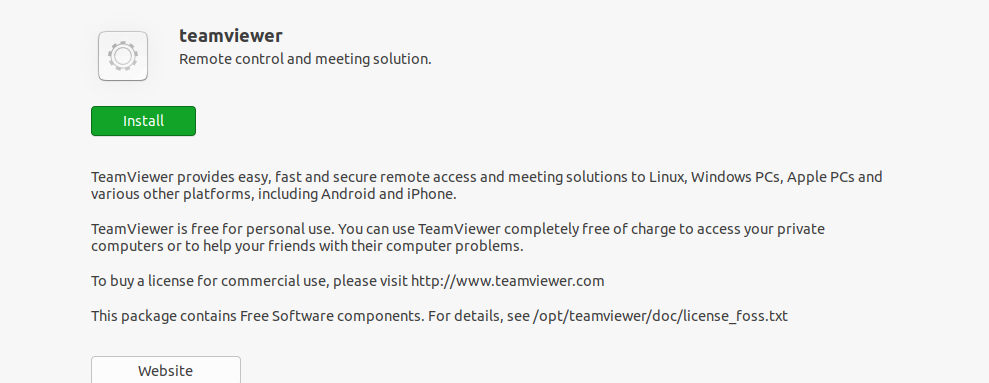
Click on the Install button. An authentication dialog will pop up prompting you for a password in order to allow the installation to take place. Provide your password and, click on the authenticate button. Then the installation process will now begin.
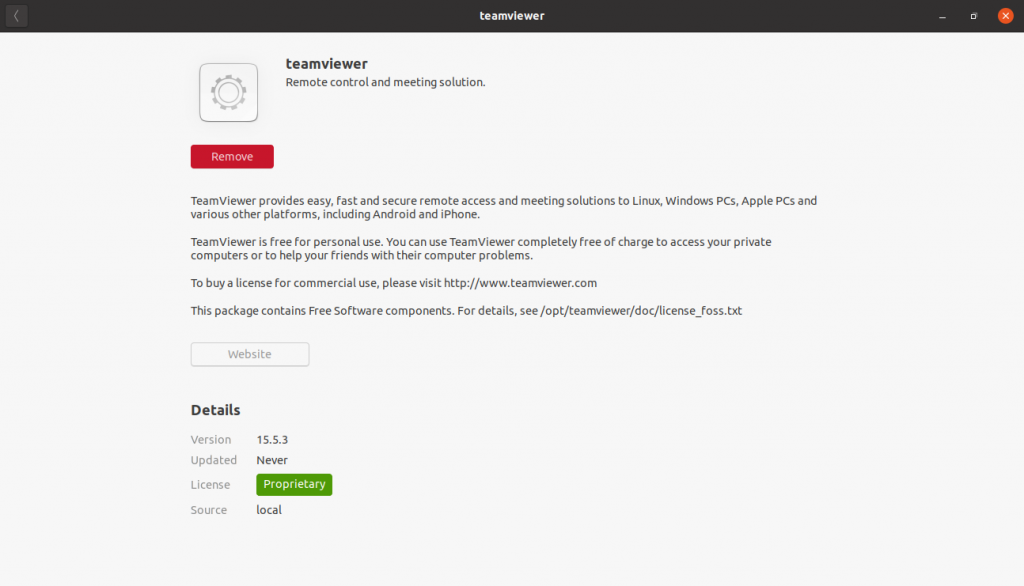
After Teamviewer has been installed, there will be a display like this one on your window.
To launch TeamViewer, simply head to the application menu and type Teamviewer. Then click on the TeamViewer application icon to open.
Uninstall TeamViewer
To upgrade TeamViewer to the latest version you have to first uninstall the older version either from the command line or GUI, and download the latest version from the site.
If you want to uninstall TeamViewer together with some configurations that you might have made, simply run this command.
$ sudo apt purge teamviewer
Also, you can remove Teamviewer without removing any configurations made.
$ sudo apt remove teamviewer
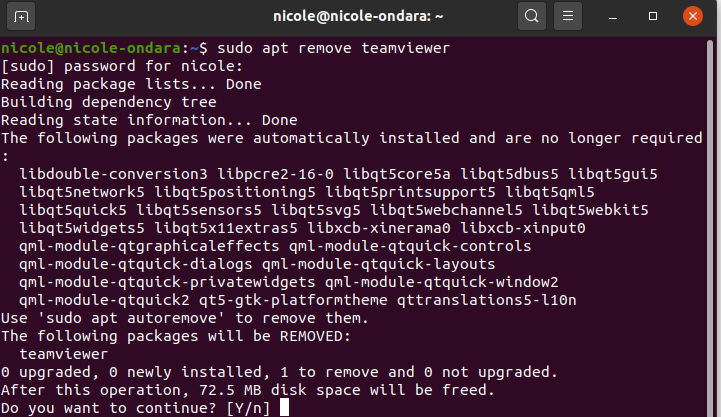
The system will prompt you with the [Y/n] option, insert 'Y' then press enter to continue. Now Teamviewer will be uninstalled.
Uninstall TeamViewer from GUI
To remove TeamViewer through the Users Interface is very easy. On the desktop activities, click on the Ubuntu software application. When it opens, click on the installed tab that is located at the top of the window, in the middle of two other tabs. Then locate the Teamviewer application.
You will notice that every installed app has the remove button in front of it. In this case, click on the remove button which is in front of the TeamViewer app.

A pop up will appear on your screen asking if you are sure to remove the software or not. Click on the remove button then, an authentication will display asking for a password. Insert your password then click authenticate to allow the installation to take place.
Conclusion
The User Interface is always considered simple and easy while the use of the terminal is quite fast. In this tutorial, we have covered the two ways that you can use to install Teamviewer on Ubuntu 20.04 LTS.
If you encounter a black screen on a remote computer, and some cases reinstall fixed the issues.
If you are looking for Team Viewer Alternatives, , , can be considered which I can cover in some other tutorial.
转载地址:http://bwwt.baihongyu.com/